Blender Manager
A downloadable tool for Windows
Blender Manager includes several powerful features designed to streamline project setup and tracking, all without the need to open Blender initially. Here’s a closer look at some of its standout functionalities:
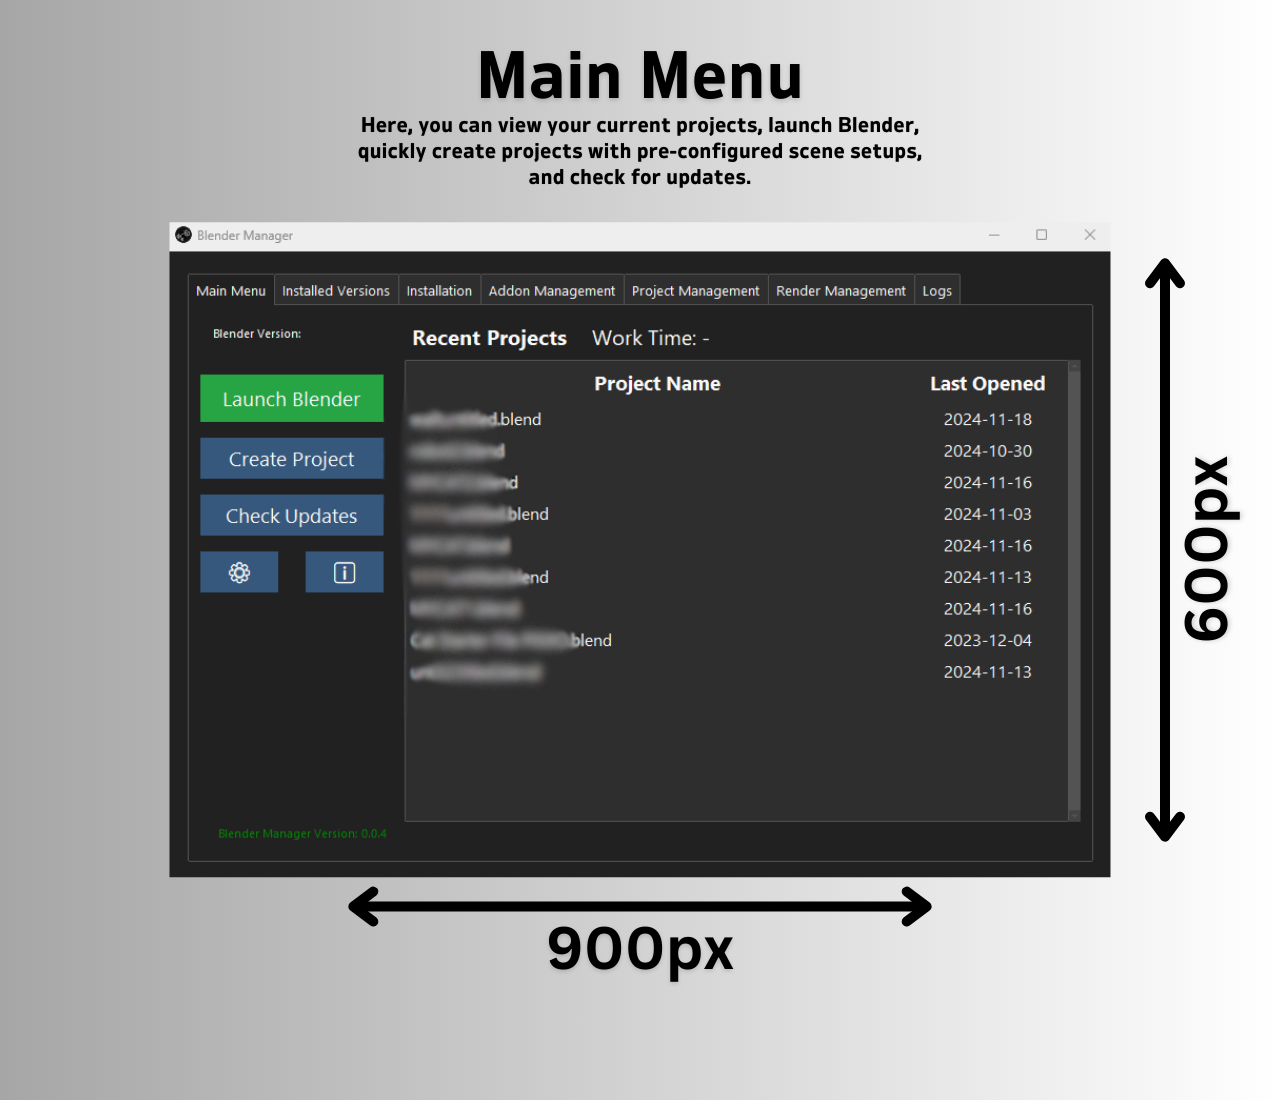
1. Project Time Tracking
Blender Manager automatically tracks the time spent on each project, giving users a clear view of their work hours. This feature is integrated directly into the Recent Projects section, displaying the total time spent on a project. Users can monitor their productivity and get a detailed breakdown of working hours for each project, making it an excellent tool for both personal time management and client billing.
2. Recent Projects Overview
The Recent Projects feature provides a convenient list of previously opened Blender files, showing key details such as the project name, last opened date, and file path. Users can easily access their most recent work without manually searching through directories, enhancing workflow efficiency by allowing them to quickly resume their work from where they left off.
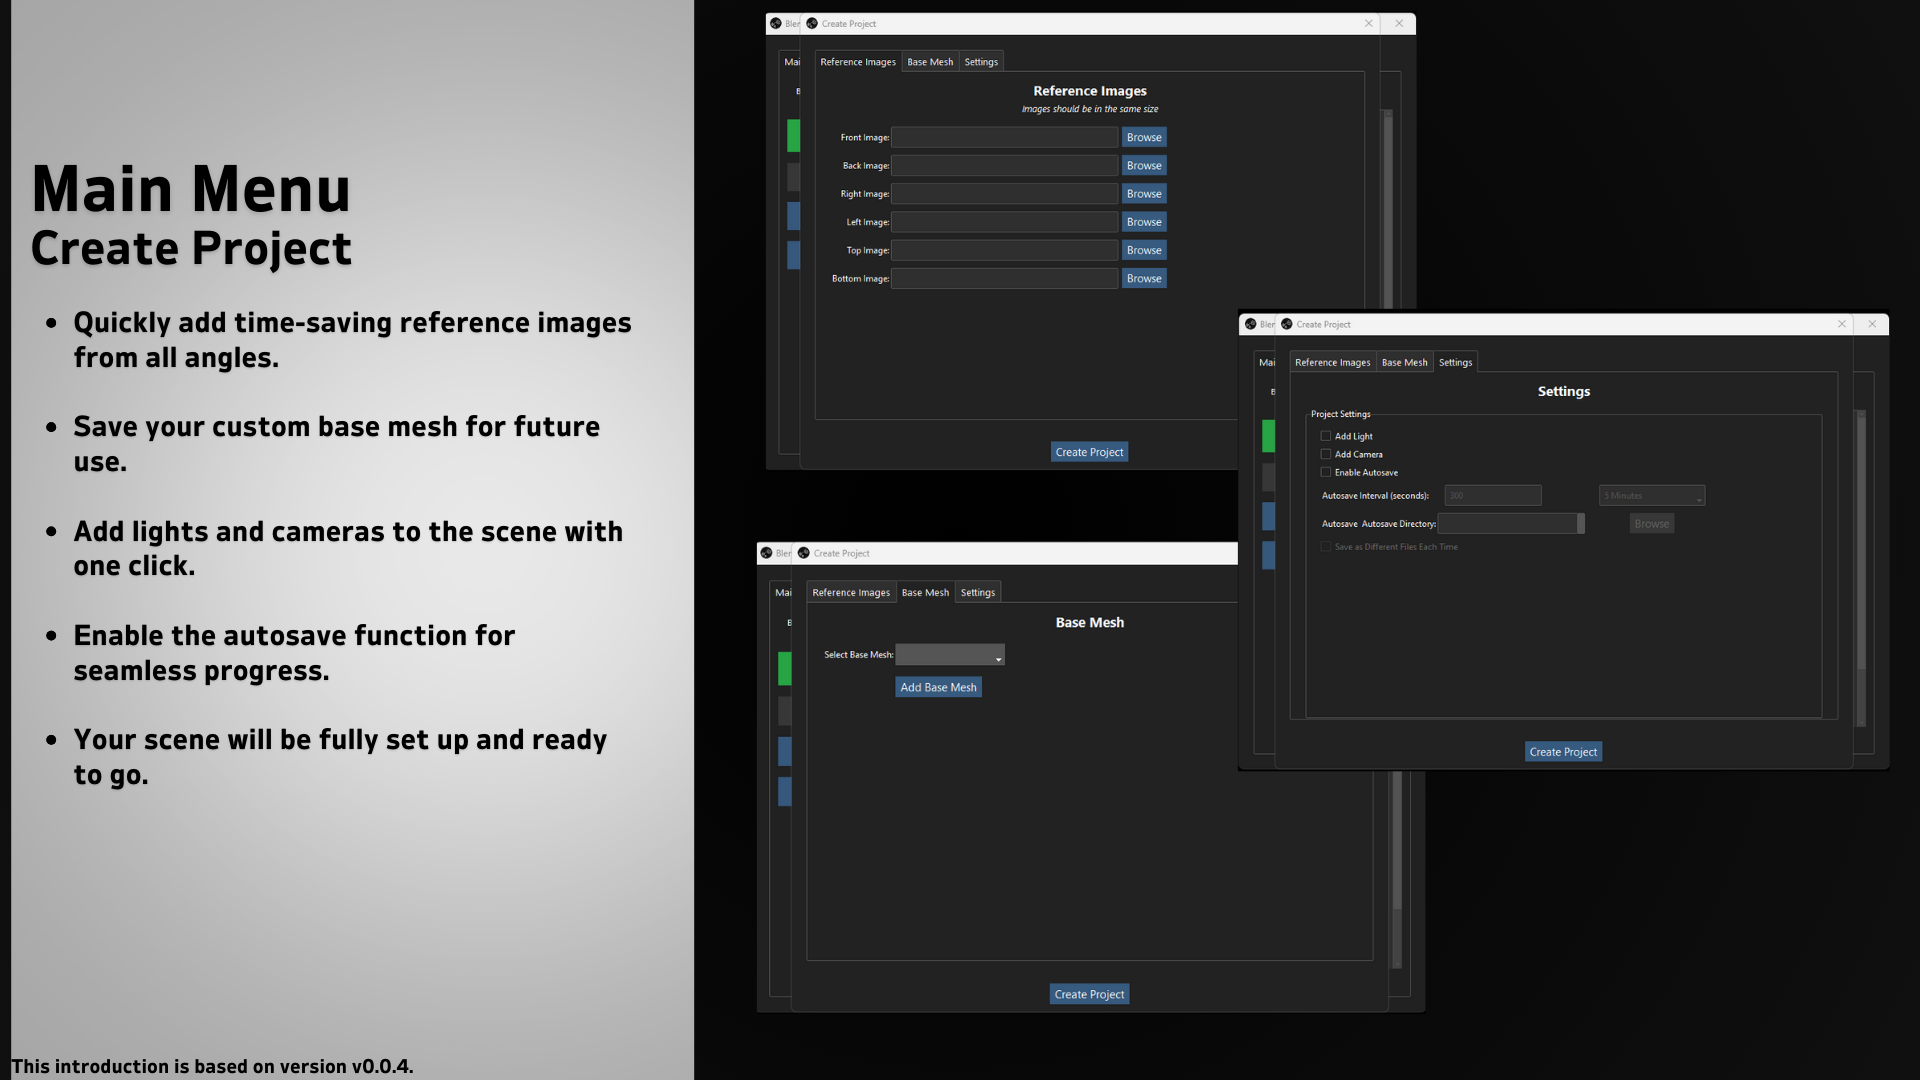
3. Comprehensive Project Creation
Blender Manager offers an advanced Create Project tool that allows users to set up their project environment without launching Blender. This includes:
- Reference Images Setup: Import reference images for multiple views (front, back, left, right, top, and bottom) to ensure all necessary reference materials are organized and ready for modeling.
- Base Mesh Selection: Choose a base mesh from a predefined list or add your own custom base meshes for a quick start with pre-configured models.
- Scene Configuration: Predefine scene elements such as adding a camera and lights, and configure autosave options for immediate work upon opening the project in Blender.
4. Auto Update
Includes an Auto Update feature, ensuring both the Blender application and Blender Manager itself are always up to date. The app automatically checks for the latest releases and offers a simple one-click update option.
5. Customizable GUI
The user interface is highly customizable. Users can choose from a variety of themes, adjust font sizes, and control the transparency of the app, allowing for a personalized and comfortable experience.
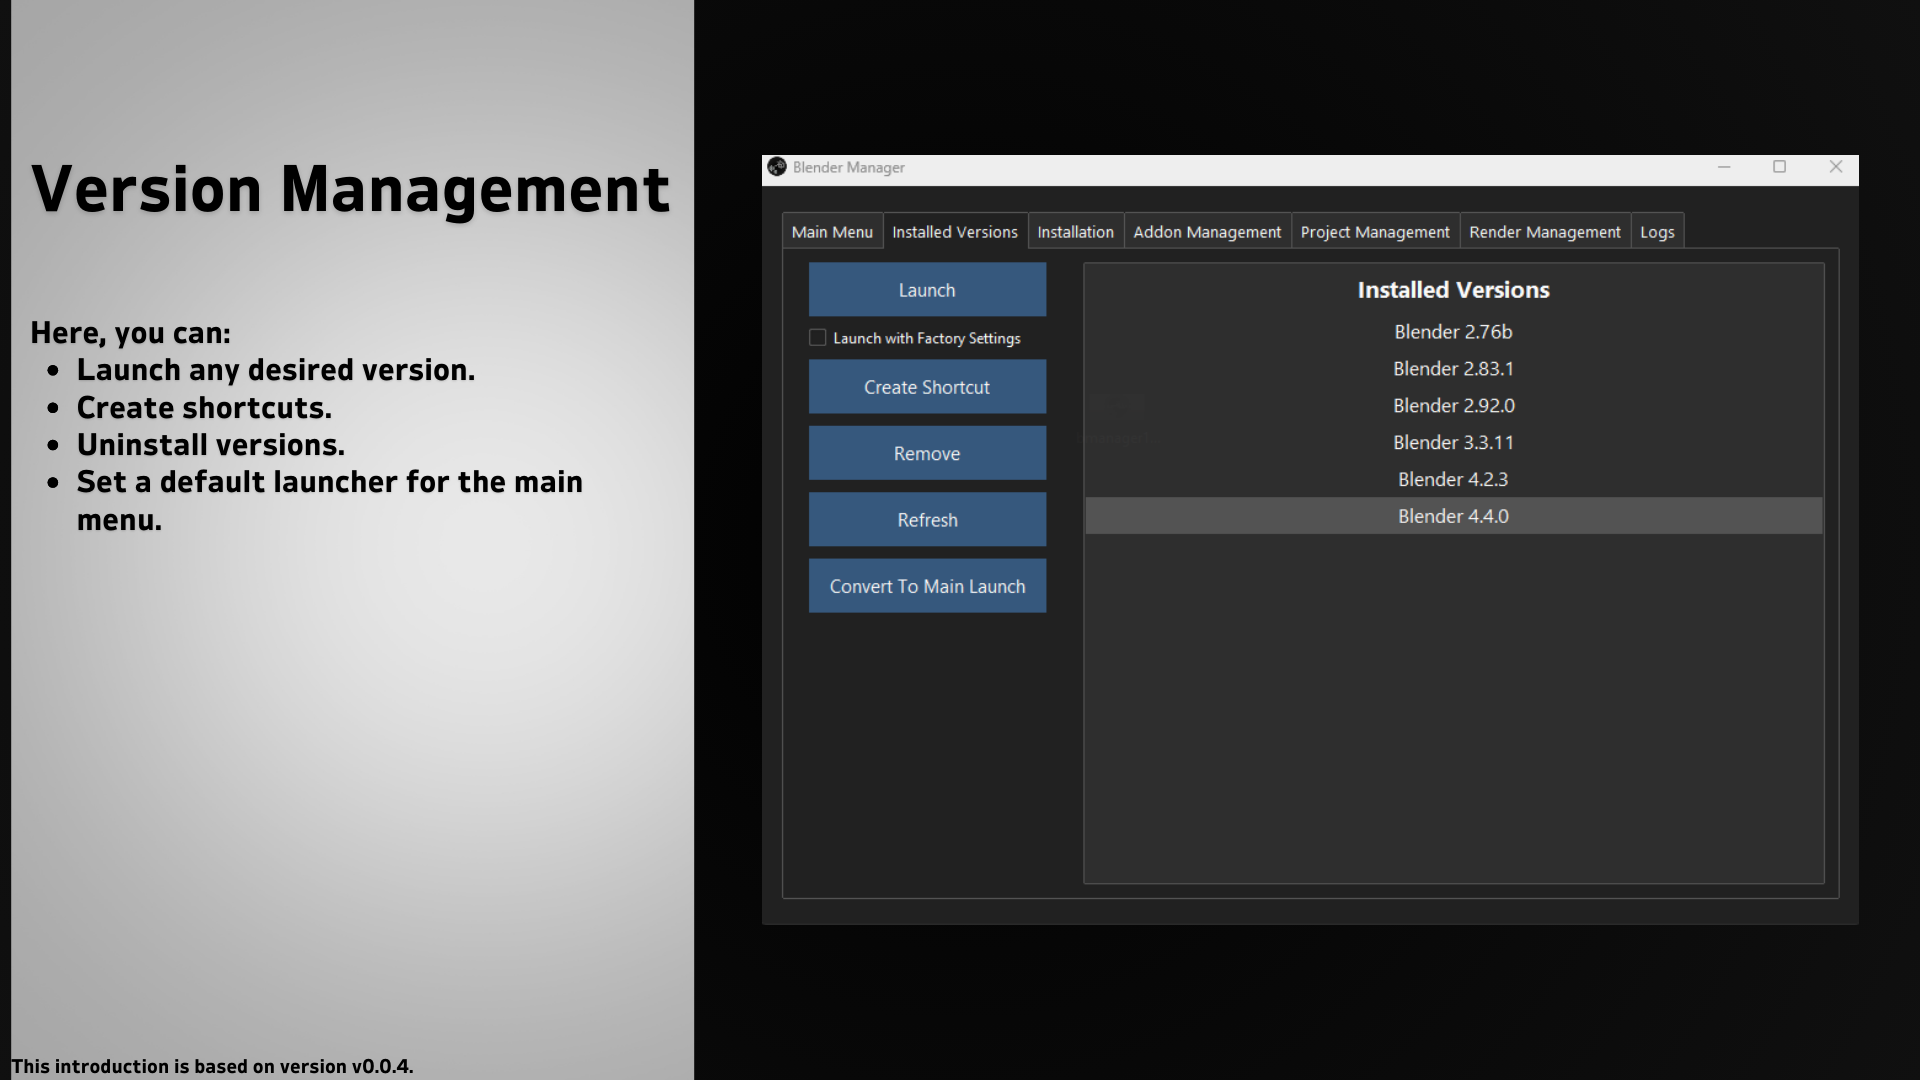
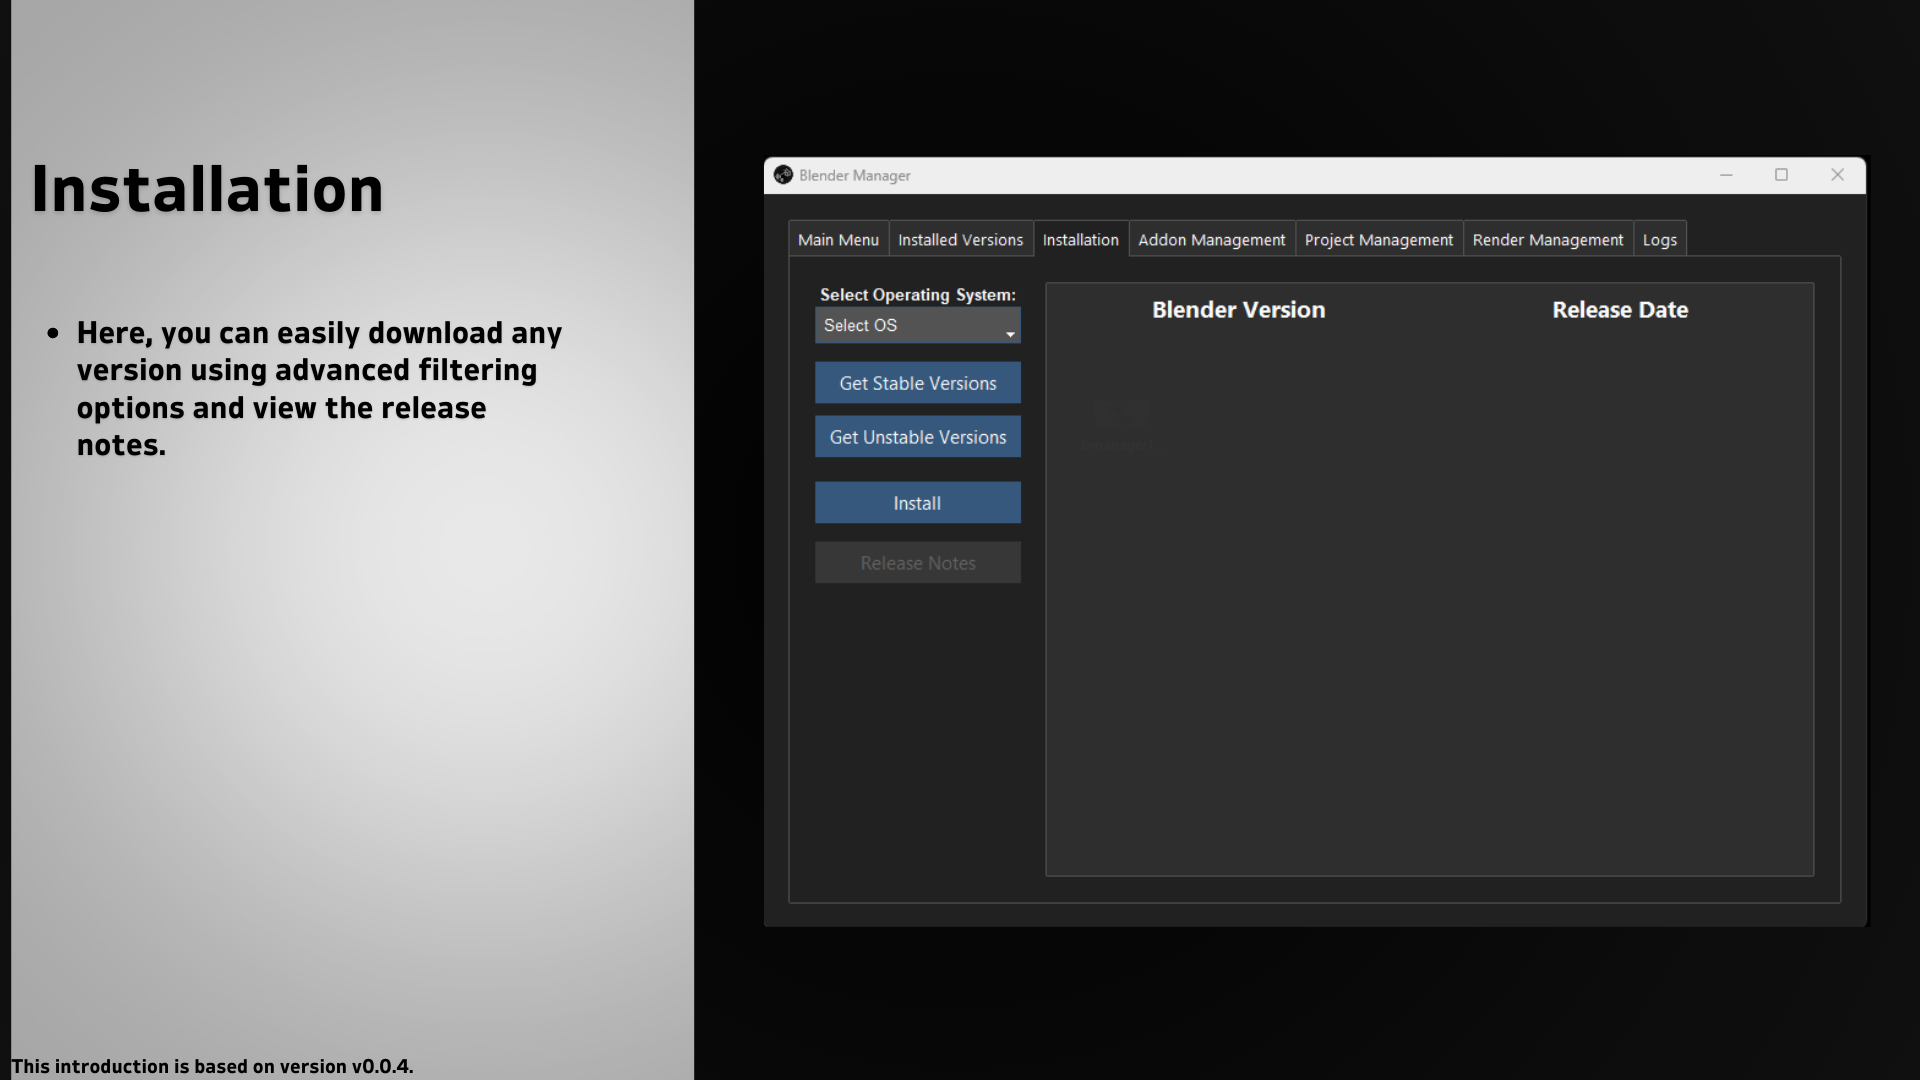
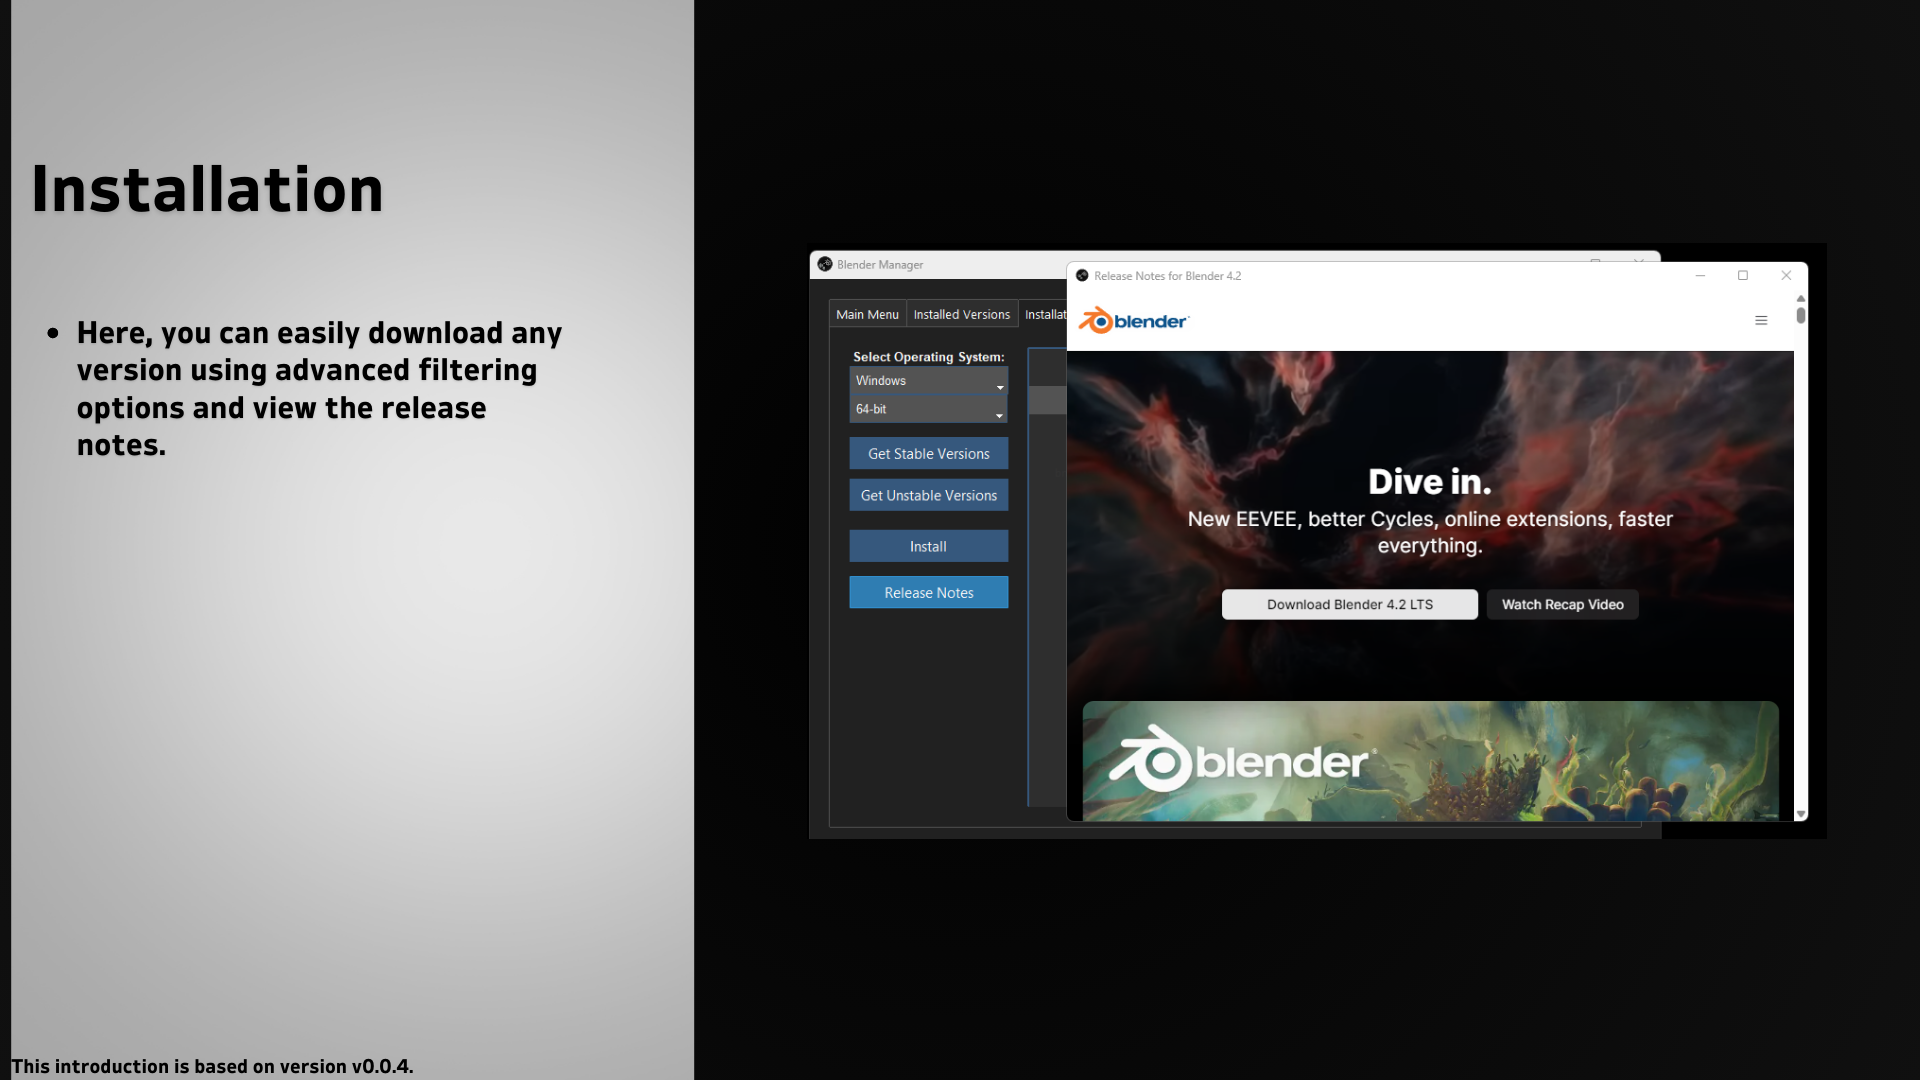
6. Seamless Version Control
Manage multiple Blender versions effortlessly. Install any version you need, switch between them, or set a specific version as the Main Launch Version.
7. Multi-Platform Support (In Progress)
Currently optimized for Windows, with plans to expand full compatibility to macOS and Linux in future releases.
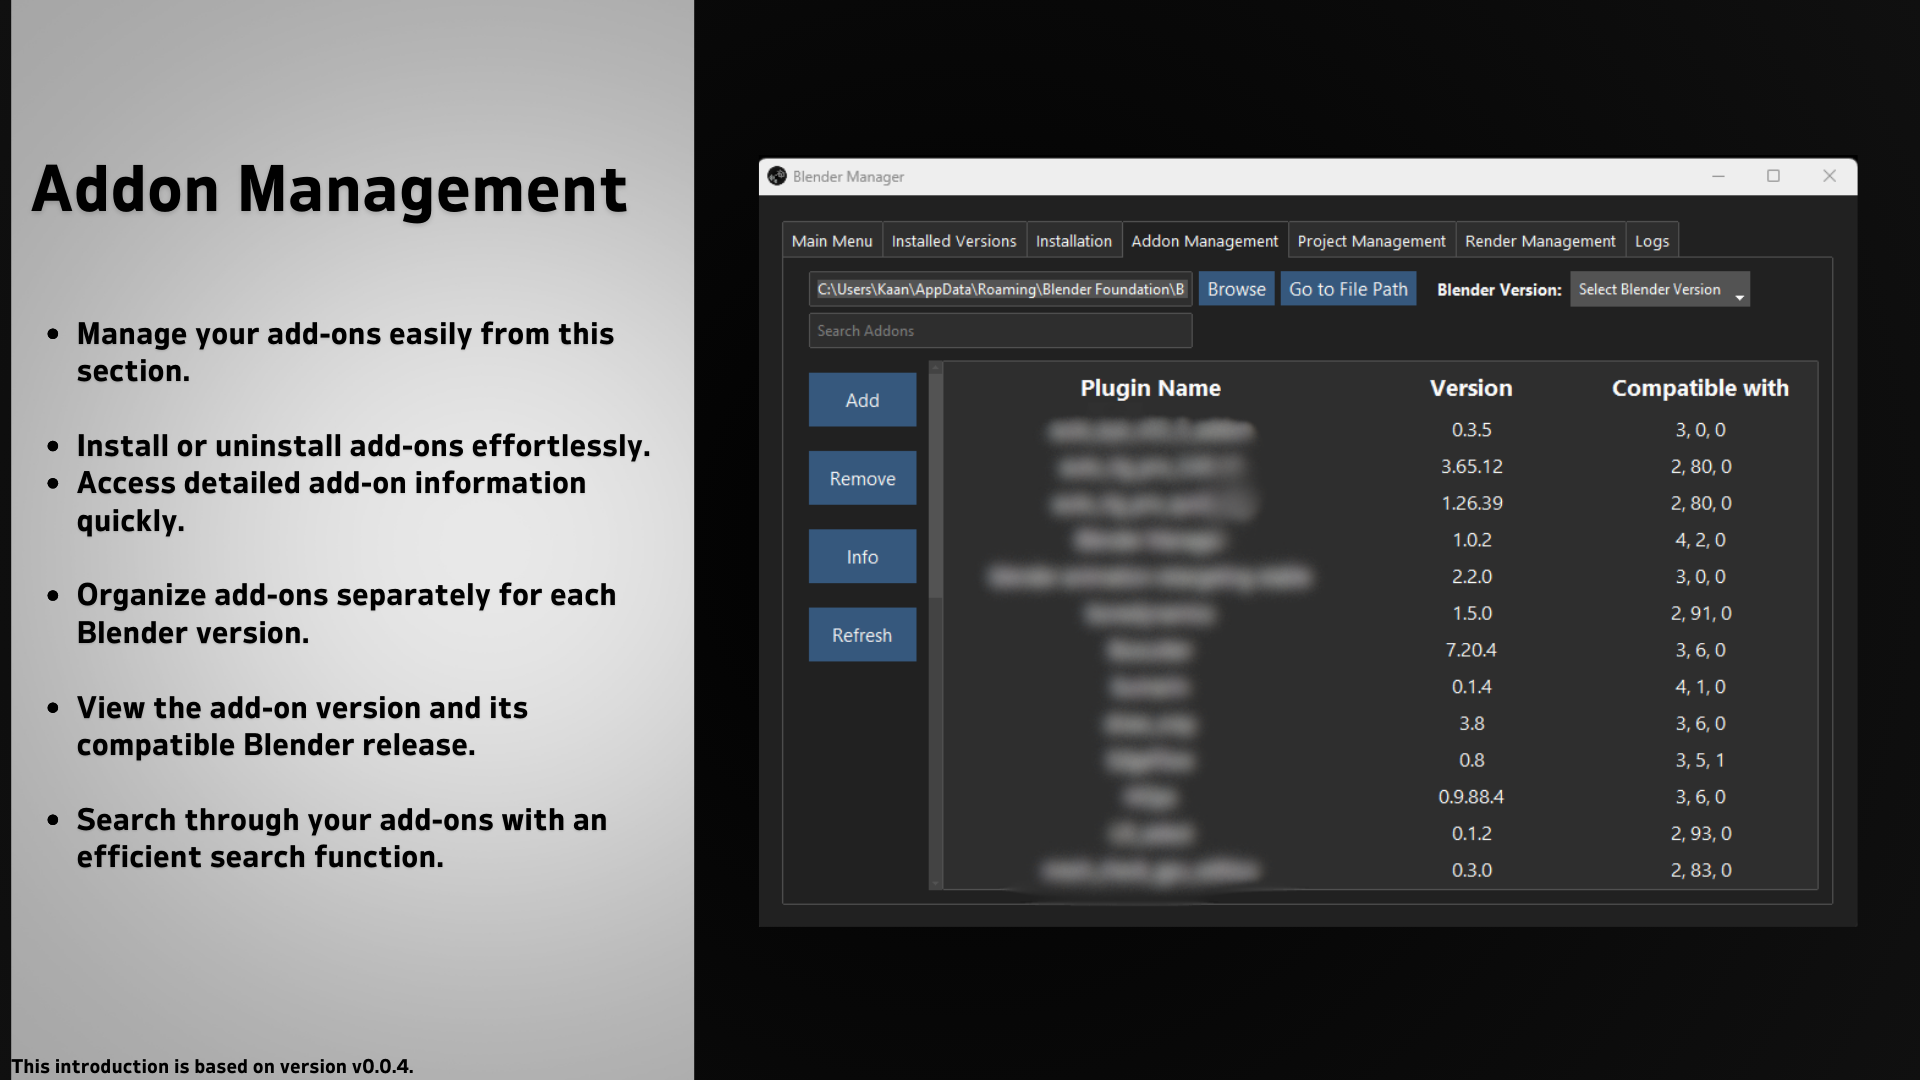
8. Addon Management
Provides an intuitive Addon Management tab to handle Blender addons efficiently. Key features include:
- Addon List Display
- Addon Installation and Removal
- Compatibility Check
- Search Functionality
- File Path Access
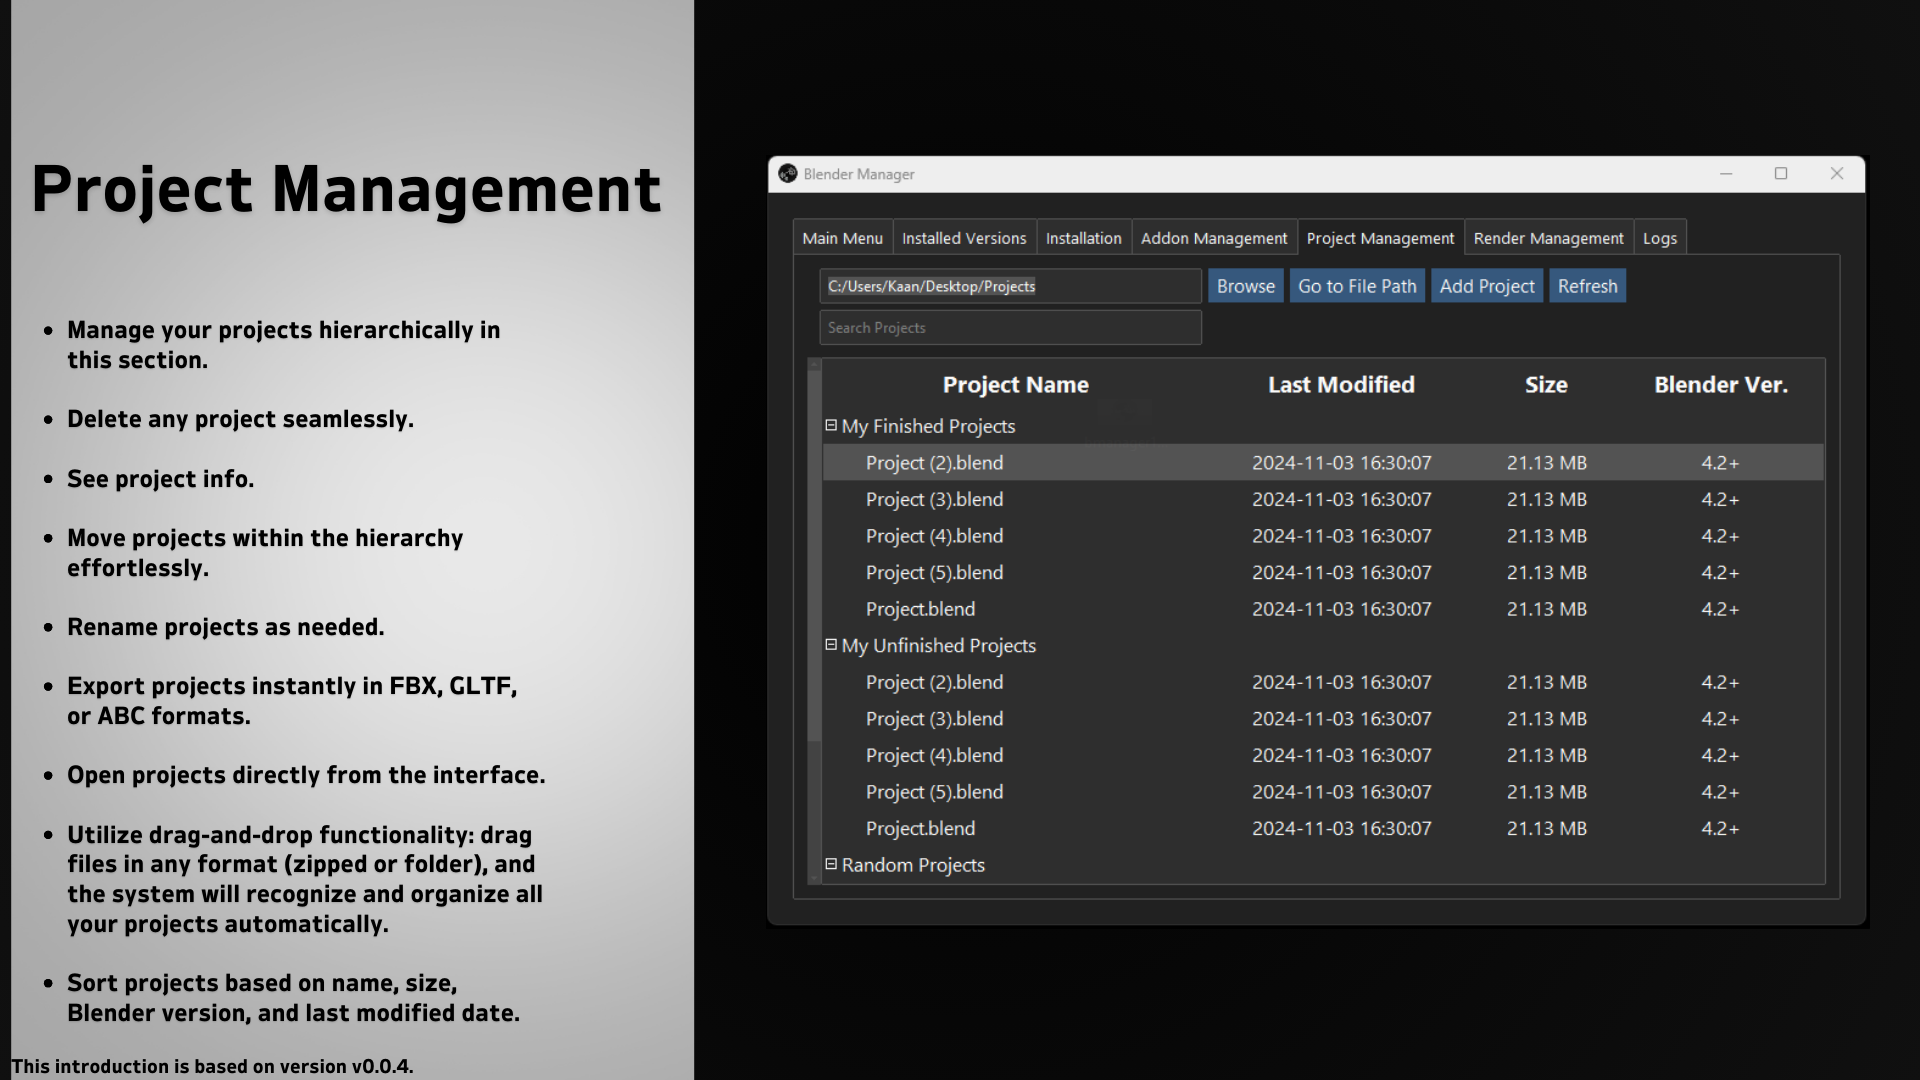
9. Project Management
Offers comprehensive tools for organizing and handling Blender projects:
- Project List Overview
- Quick Actions
- File Path Navigation
- Search Bar
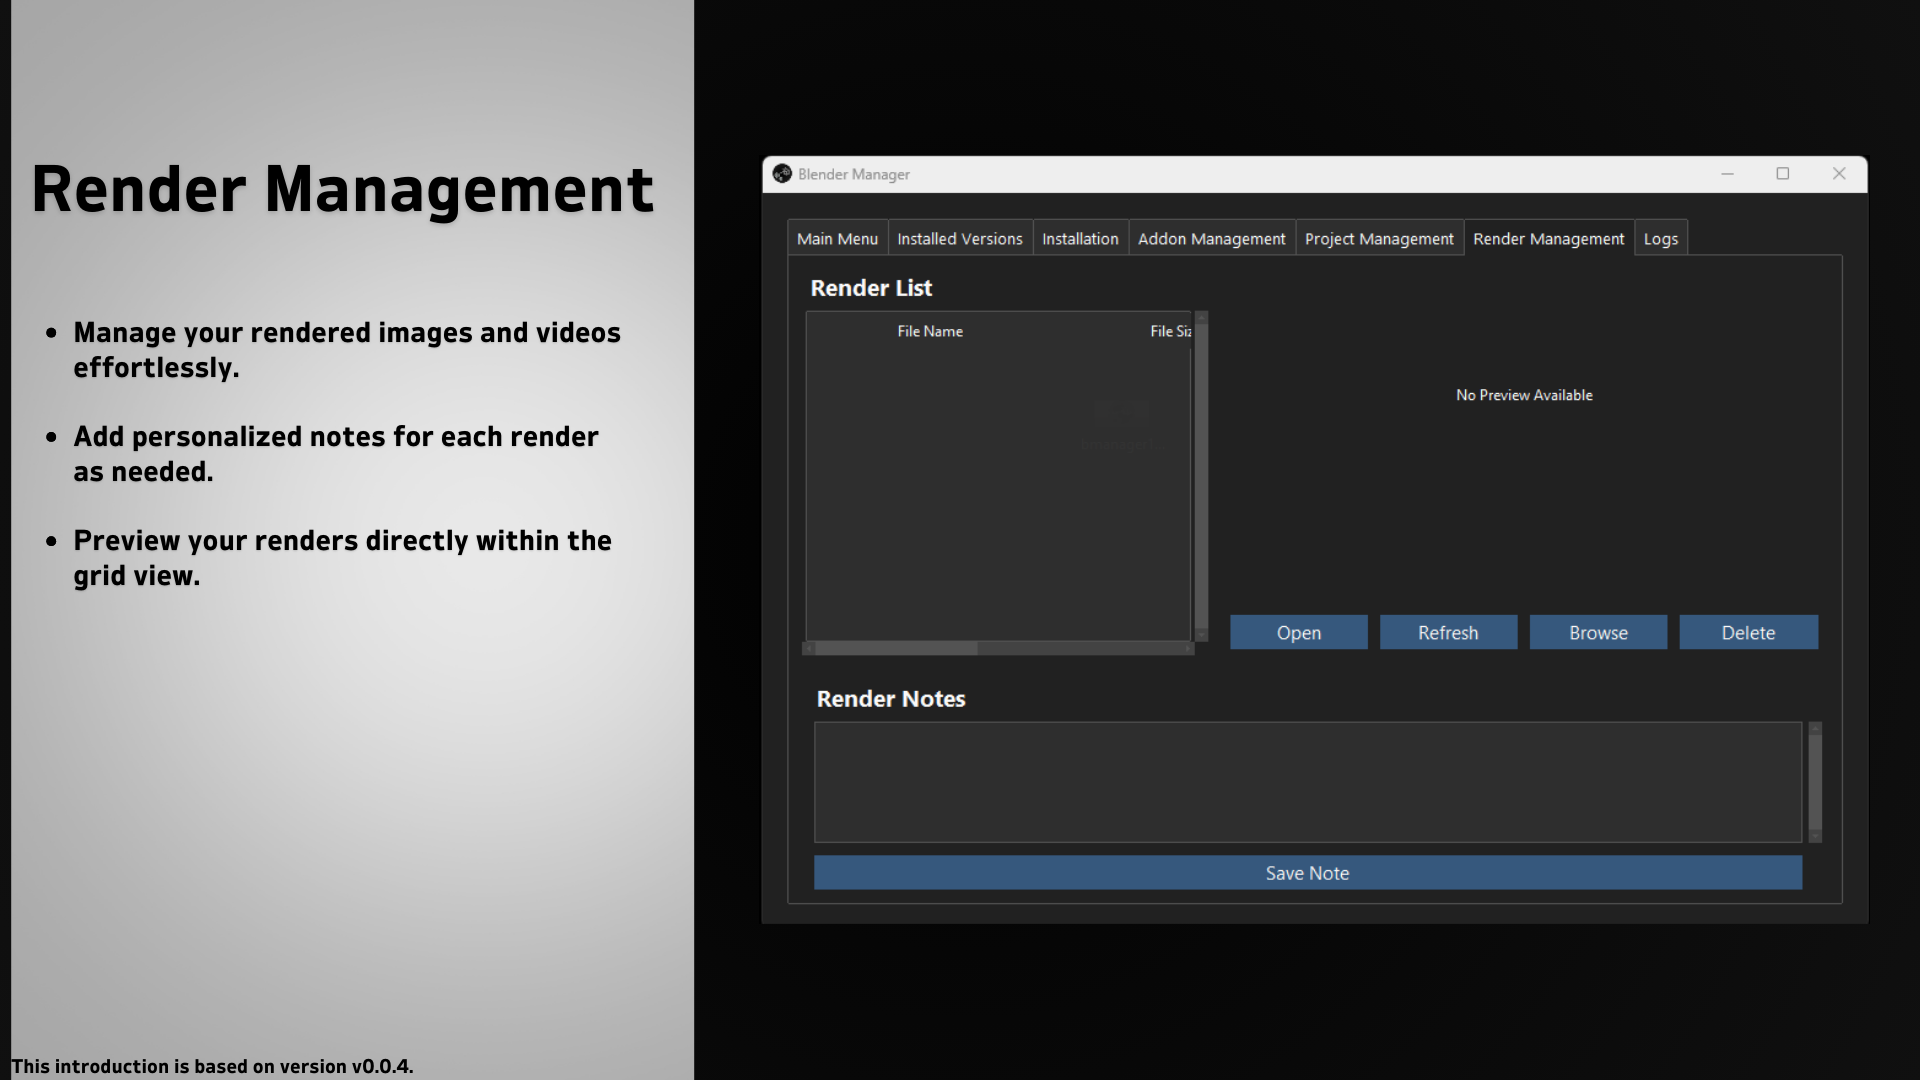
10. Render Management
Makes it easy to handle rendered files directly within the app:
- Render List
- Preview Capability
- File Operations
- Render Notes
11. Logs Tab
Provides real-time feedback and diagnostic information:
- Initialization Feedback
- Process Tracking
- Error and Warning Reporting
- Success Messages
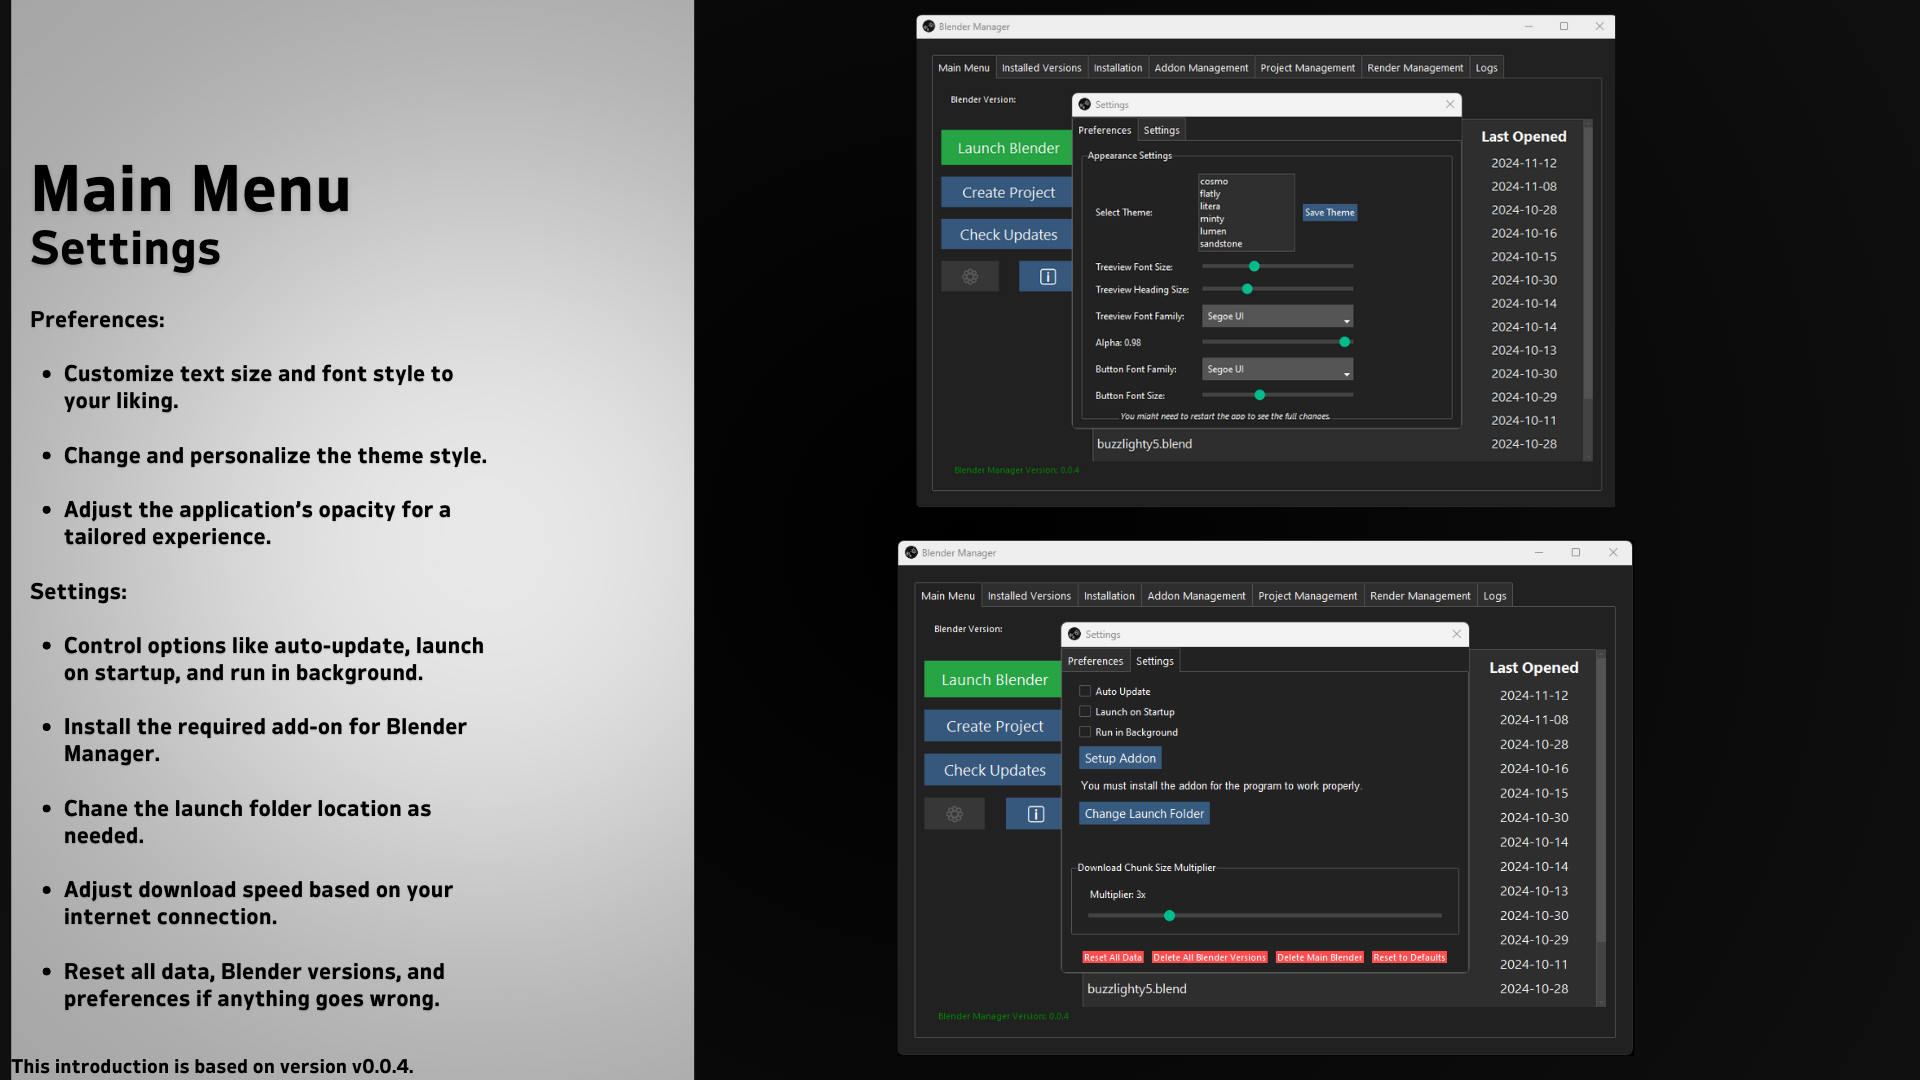
12. Settings Tab
Gives users full control over the application's appearance and behavior:
- Appearance Settings: Themes, font customization, transparency control.
- General Settings: Auto update, launch on startup, run in background, addon setup, change launch folder, download chunk size multiplier.
- Reset and Maintenance Options: Reset all data, delete Blender versions, reset to defaults.
Download
Install instructions
🛠️ Blender Manager Installation Guide
Follow these steps to install and set up Blender Manager on your system.
Step 1: Download and Extract the ZIP File
- Download the Blender Manager ZIP file 📥 Download Latest Release
- Extract the ZIP file to a location of your choice:
- Right-click the ZIP file and select "Extract All" or use a tool like WinRAR or 7-Zip.
- After extraction, you’ll find a folder named "BlenderManager".
Step 2: Launch Blender Manager
- Open the BlenderManager folder.
- Double-click on
blender_manager.exeto start the application.- If a security prompt appears, click "Run Anyway".
Step 3: Setup the Blender Addon
- Ensure Blender is already installed on your system.
- Open Blender Manager and go to the Settings tab.
- Click the "Setup Addon" button.
- The application will automatically detect all installed Blender versions and install the addon.
- Wait for the process to complete. A confirmation message will appear once the addon is successfully installed.
Step 4: Verify the Addon Installation
- Launch Blender.
- Navigate to Edit > Preferences > Add-ons.
- In the search bar, type "Blender Manager".
- Ensure the addon is enabled (checkbox is checked).
- Restart Blender for the changes to take effect.
🎉 You're All Set!
Blender Manager is now installed and ready to enhance your Blender workflow. Enjoy streamlined project management and efficient tool integration!